Blog
How to Set Up Cisco Meraki: 4 Official Cisco Videos on Organisation, Admins, Licensing and Inventory


If you have been wondering how to set up Cisco Meraki properly, Cisco has put the answer into four short videos. Together they take about twenty minutes to watch, and they cover the four things that set everything else up well: your organisation structure, your administrators, your licences, and your inventory.
They are genuinely useful, whether you are new to Meraki or have been running it for years and want a refresher. We have linked all four below, with a note on what each one gives you and where to read further.
How to Set Up Cisco Meraki in Four Steps
Here is how to set up Cisco Meraki from scratch: create your organisation and network, add at least two administrators, claim your licences, then claim your inventory.
Step 1: Create an Organisation and Network
Watch: Meraki Onboarding Step 1: Create an Organization and Network
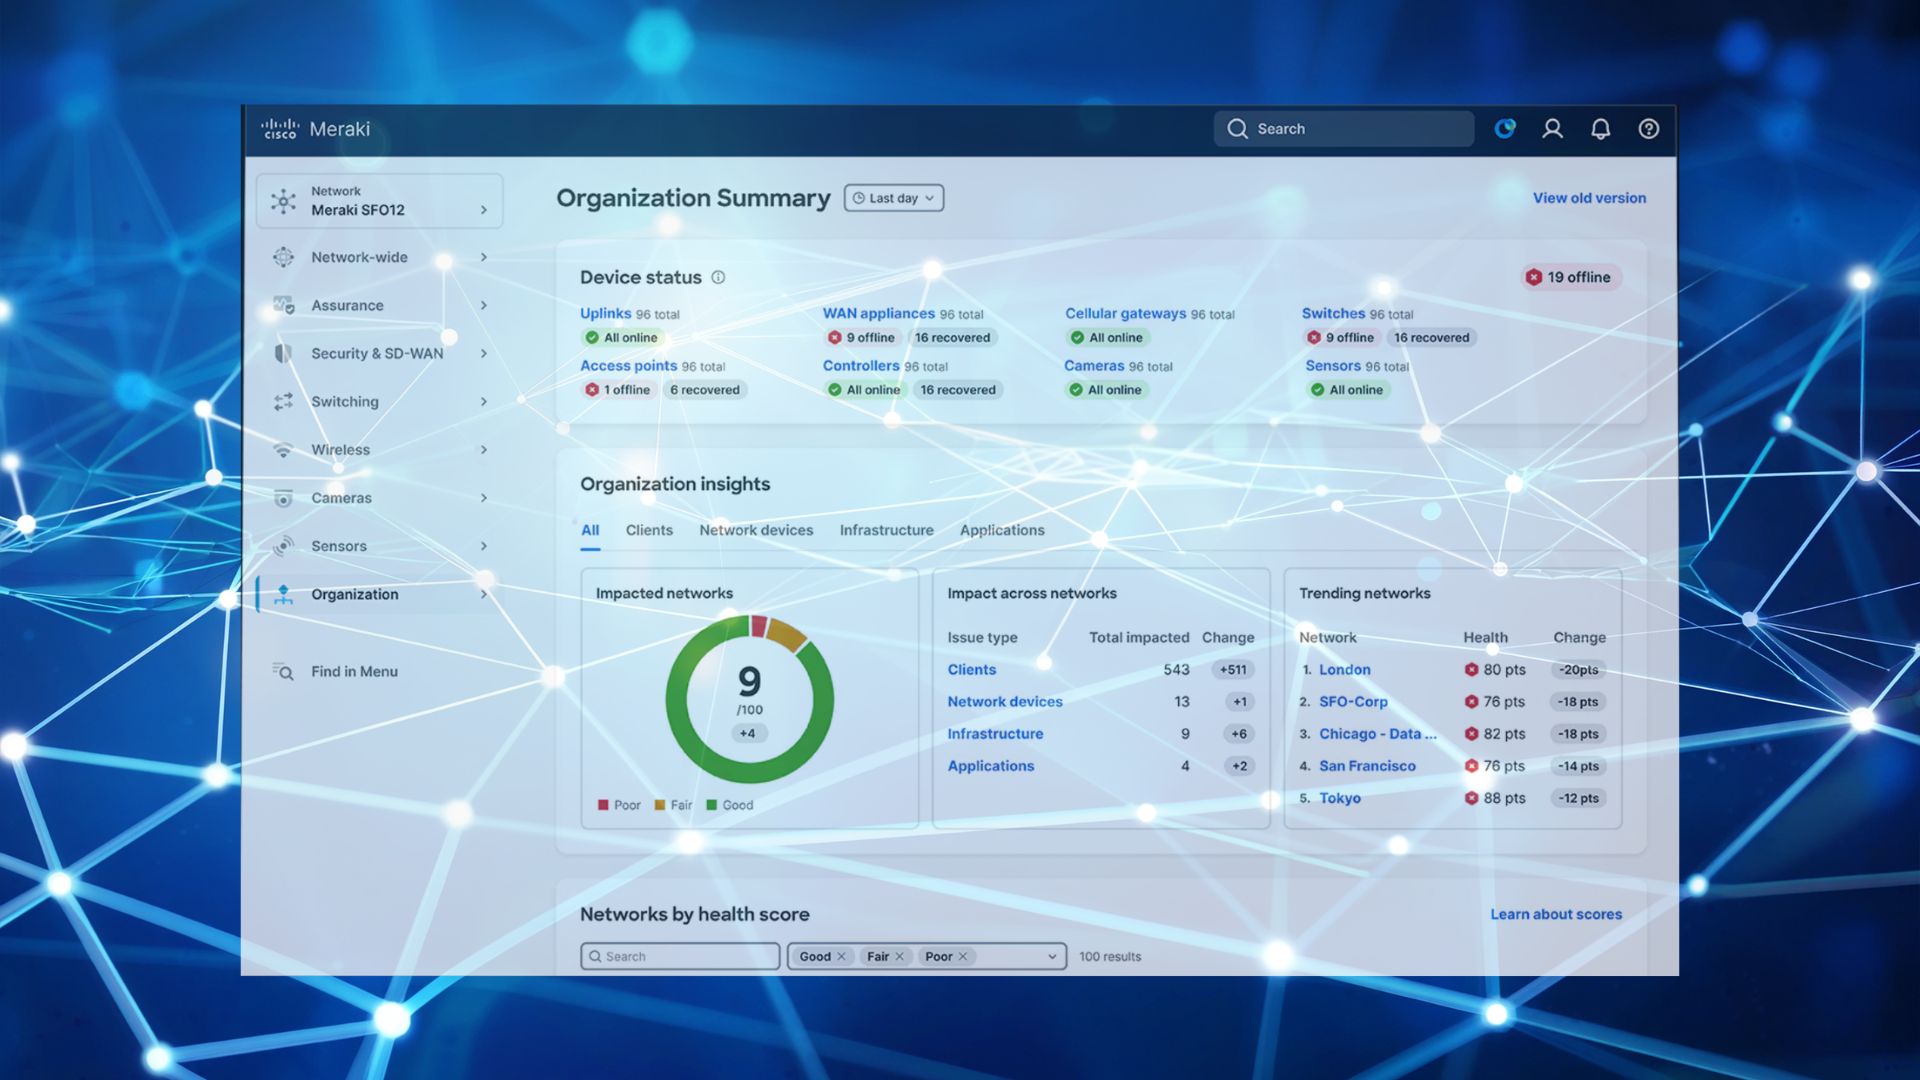
This video walks you through creating your organisation and your first network, which is the foundation everything else sits on. It is worth watching with your own business in mind: how many sites you have, which of them need their own policies, who needs visibility across which locations, and where you expect to grow over the next few years. A structure that reflects how you actually work makes every later change quicker.
Cisco’s reference material on Meraki Cloud Architecture and Dashboard Organizational Structure is a good companion read.
How G5 can help: this is the step that shapes everything after it, so it is the one we are asked about most when clients want to know how to set up Cisco Meraki for more than one site. We design the organisation and network structure with you, based on your sites, your teams and where you are heading, so it fits your business from day one and flexes as you grow. If you are running several locations, our guide to managing an IT network across multiple offices is worth reading alongside this step.
Step 2: Administrators Overview
Watch: Meraki Onboarding Step 2: Administrators Overview
Cisco’s recommendation here is simple and worth following: have at least two full administrators. It keeps access to your dashboard resilient and means there is always someone available to make a change when you need one.
The video also covers permission levels, which give you a simple way to share the right level of access with the right people. Read only access lets colleagues see what is happening across the network without needing full rights, so the right people stay informed and full access stays with the small group who need it.
Cisco’s guide to Managing Dashboard Administrators and Permissions has the detail.
How G5 can help: we can hold one of your administrator accounts, so you always have cover and a second pair of hands, and set up permission levels so each person on your team has exactly the access they need. That is one of the reasons businesses bring in a managed service provider for Meraki.
Step 3: Licensing Overview
Watch: Meraki Onboarding Step 3: Licensing Overview
This is the one that gives you the most back for the few minutes you spend on it. Licensing is what keeps your whole Meraki estate live and supported, and once you know your way around it, staying on top of it is straightforward.
The video explains how it all fits together, including the difference between co-termination and per device licensing, and how to see your licence status in the dashboard. Once you know where to look, keeping an eye on renewal dates takes a couple of minutes, and planning them in advance gives you room to review what you have and make sure it still matches what you are running.
Cisco’s Meraki Licensing documentation covers the mechanics. We have also written about how to choose the right Meraki licence for your business and what happens when a Meraki licence expires.
How G5 can help: we track your licence dates for you and handle renewals before they come round, and we are happy to review your current licensing to check it still matches the kit you are running.
Step 4: Inventory
Watch: Meraki Onboarding Step 4: Inventory
Claiming your devices into the dashboard using their serial numbers is the step that brings your kit fully under management. The video shows you how to do it manually and through the Meraki mobile app, available on iOS and Android, which saves a lot of typing when you are standing in front of the hardware.
Cisco’s guide to Using the Organization Inventory is the reference to keep to hand.
How G5 can help: we claim and register your devices for you and keep your inventory up to date as kit is added, moved or replaced, so the dashboard always reflects what is really on your network.
Going further
Two more resources worth bookmarking:
- Meraki Platform Fundamentals, a free self paced training course from Cisco
- New to Cisco Meraki, the community forum where Meraki users and Cisco staff answer questions
All of it lives on Cisco’s Getting Started with Meraki page, which is worth bookmarking if you want to go deeper than how to set up Cisco Meraki and into running it day to day.
Frequently asked questions
How do you set up Cisco Meraki?
Setting up Cisco Meraki takes four steps: create your organisation and network in the Meraki dashboard, add at least two full administrators, claim your licences, then claim your inventory by serial number. Cisco provides an official video for each step.
How G5 can help: we can run all four steps for you, from building the organisation and network structure through to claiming your licences and inventory, so your dashboard is ready to use from day one.
What is the difference between co-termination and per device licensing in Meraki?
Co-termination licensing pools all your Cisco Meraki licences under a single expiry date for the whole organisation. Per device licensing assigns a licence to each individual device with its own expiry date. Per device gives you finer control, co-termination is simpler to administer.
How G5 can help: we confirm which model your estate is on and keep track of the dates either way, so you always know exactly where your licences stand and renewals are handled before they come round.
How many administrators should a Cisco Meraki organisation have?
Cisco recommends at least two full administrators for every Meraki organisation. This keeps dashboard access resilient and means someone is always available to make changes. Other colleagues can be given read only access so they can see network activity without holding full rights.
How G5 can help: we set the administrators and permission levels up as part of the initial setup, and can hold one of the accounts ourselves so you have cover from the start.
Talk it through with us
If you would rather not work out how to set up Cisco Meraki on your own, we can do it with you. Book a slot in the diary to walk through your setup, confirm where your licences stand, or talk through anything in these videos, and we will pick it up from there.